I hosted an FSM-themed (FSM — Finite State Machine) webinar for Yandex.Praktikum platform with my colleague Zakhar Ovcharov a few days ago. The webinar is already available on Youtube. If you speak Russian, check this out!
There is also a Russian version of this article available on Habr.
Since Zakhar was an expert, the credit for the very existence of this article goes to him. My part was writing this article and creating an FSM-based complex React component in the Complex Form part.
Now that everything is settled, lets’ start!
Finite State Machine
First, the definition:
A finite-state machine (FSM) is an abstract machine that can be in exactly one of a finite number of states at any given time. The FSM can change from one state to another in response to some inputs; the change from one state to another is called a transition. An FSM is defined by a list of its states, its initial state, and the inputs that trigger each transition
That’s it. FSM has a finite number of states, stays in one of them at every moment, and has some rules for the transition from one state to another.
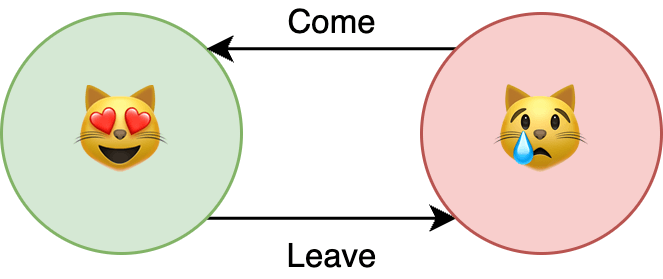
For clarity, imagine a cat named Willy. Let’s say Willy could be either happy or sad. Right now, Willy is happy. When you leave, Willy becomes sad. When you come back, Willy’s happy again. You could argue that cats don’t care much if you leave and come again, but my little one does. You probably see the connection already:
- States. Willy is either happy or sad and can’t be both
- Initial state. We assumed Willy is happy by default
- Transitions. You may leave or come, and Willy will change its current state
We can also depict it with a diagram.
This is the simplest FSM I have come up with. In this article, we will discuss usage examples and write our own FSM implementation from scratch. We will also solve a couple of tasks with it.
Let’s go!
Usage Examples
FSM could be used to describe an algorithm to approach some task or to model almost any process. Few examples:
- Language check. This is what we’re going to do in the Binary Code Check part
- AI logic for games. Here’s an article that covers this idea
- Syntax and Lexical analysis. If you want to know more about this, give this piece a read
- Complex components. There is a good one for this case too, and we will also cover it in the Complex Form part
You could easily extend this list if you want to: FSM is used in many different areas, including linguistics, computer science, biology, mathematics, and even philosophy.
Binary Code Check
Let’s create our first FSM!
Check the final example or code along.
For this one, we’ll have to create a deterministic finite-state acceptor. It is FSM, which goal is to accept or reject some value based on its definitions. We already discussed states, initial state, and transitions, but now we have to define two other options:
- Alphabet. Set of symbols that testable value has to have (and not one symbol outside it)
- Finite states. A subset (possibly empty) of existing states. When FSM finishes its work, it accepts the testable value if this subset includes the current state and rejects otherwise
Let’s talk about the task:
- We have to create FSM to test random values to check if it’s binary code
- We accept non-empty strings with characters 0 and 1 and reject anything else https://gist.github.com/kotosha-real/57dee4f3bc50692639880d0ae682827d To handle this, FSM should check the testable string character by character. Every character should be tested against the specified alphabet. Every iteration should produce the transition. When it’s done, FSM should decide whether the testable value is accepted or not based on the current state and the specified finite states.
Here’s our FSM:
This is a class-based FSM capable of testing random values against its definitions. To use it, we have to create its instance with all required params. Let’s break it down:
- Alphabet. It’s an easy one. We accept only characters 0 and 1
- States. It’s easy too. Value either binary or not. We name states
q0andq1whereq0is “value is not binary code” andq1is “value is binary code” - Initial state. We don’t accept an empty string, so the initial state is
q0 - Finite states. Finite states mark the value as accepted. In our case, the only suitable state is
q1 - Transitions. Check the diagram below
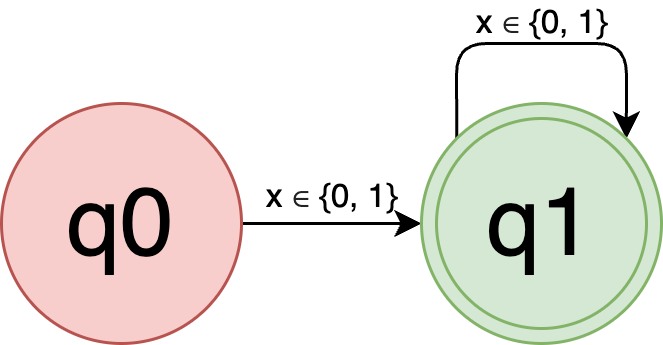
Each state has transitions for characters 0 and 1. Remember, transitions occur on every iteration. You could read it like this:
- If the current state is
q0state and the current symbol is 0 or 1, perform the transition to the stateq1 - If the current state is
q1state and the current symbol is 0 or 1, perform the transition to the same state - If the current symbol is not 0 or 1, reject the testable value no matter what the current state is
With everything explained, let’s finally create an FSM instance and test it!
It works! Note that we didn’t specify every possible symbol for each state. FSM implementation got us covered — when the symbol does not belong to the alphabet, FSM returns early.
Complex Form
The binary check example was trivial. It’s not something you will do very often or do at all. So I have another example for you. For this one, we will build a multi-state form with the UI-oriented FSM. The final result is available at Codesanbox. You can jump into it or code along.
First, create a new React project:
create-react-app questionnaireThe project structure should look like this:
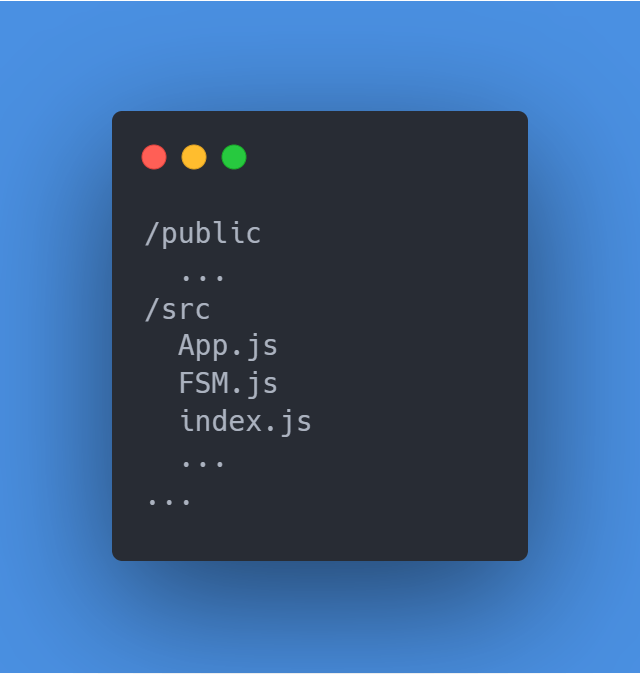
App.js and index.js don’t require any changes. FSM.js will contain the new FSM implementation. Let’s write it:
Note that we’ve stripped the alphabet and states. Now, we have just two options to define:
- Initial state. FSM has to start somewhere
- Transitions. We merge them with states, so we have condensed instantiation but provide equal functionality
It highlights the versatility of FSM — we can define them in any way suitable for the task. As long as we have states, transitions, and an initial state, we’re fine.
This implementation obliges us to use the method send to change the state. We’ve also provided a subscribe method. It is extremely useful if we want to react to the state change.
Let’s test it with our Willy example. Create the test.js file with the following content:
Now, run it with (make sure you’re in the file directory):
node test.jsThe console output should be:
happy
sad
happy
It definitely works! Finally, let’s react to Willy’s mood change:
Run it again.
happy
happy
Willy’s always happy now, ‘cause we don’t really leave him. If the state is sad after the transition, then we send the come trigger and Willy’s happy again.
It looks like everything works just fine. Let’s go to the real task!
We’re gonna build a multi-state questionnaire. There will be a bunch of states to control the questionnaire interface. Let’s say we want to question the user about his name and his occupation. If the user is a student, we will ask about the university he attends. Otherwise, he could have a job, so we will ask about it. The user can go from the education/work step of the form back to the personal step. Finally, the user can submit the questionnaire in both cases.
A little diagram to make discussed terms clear:
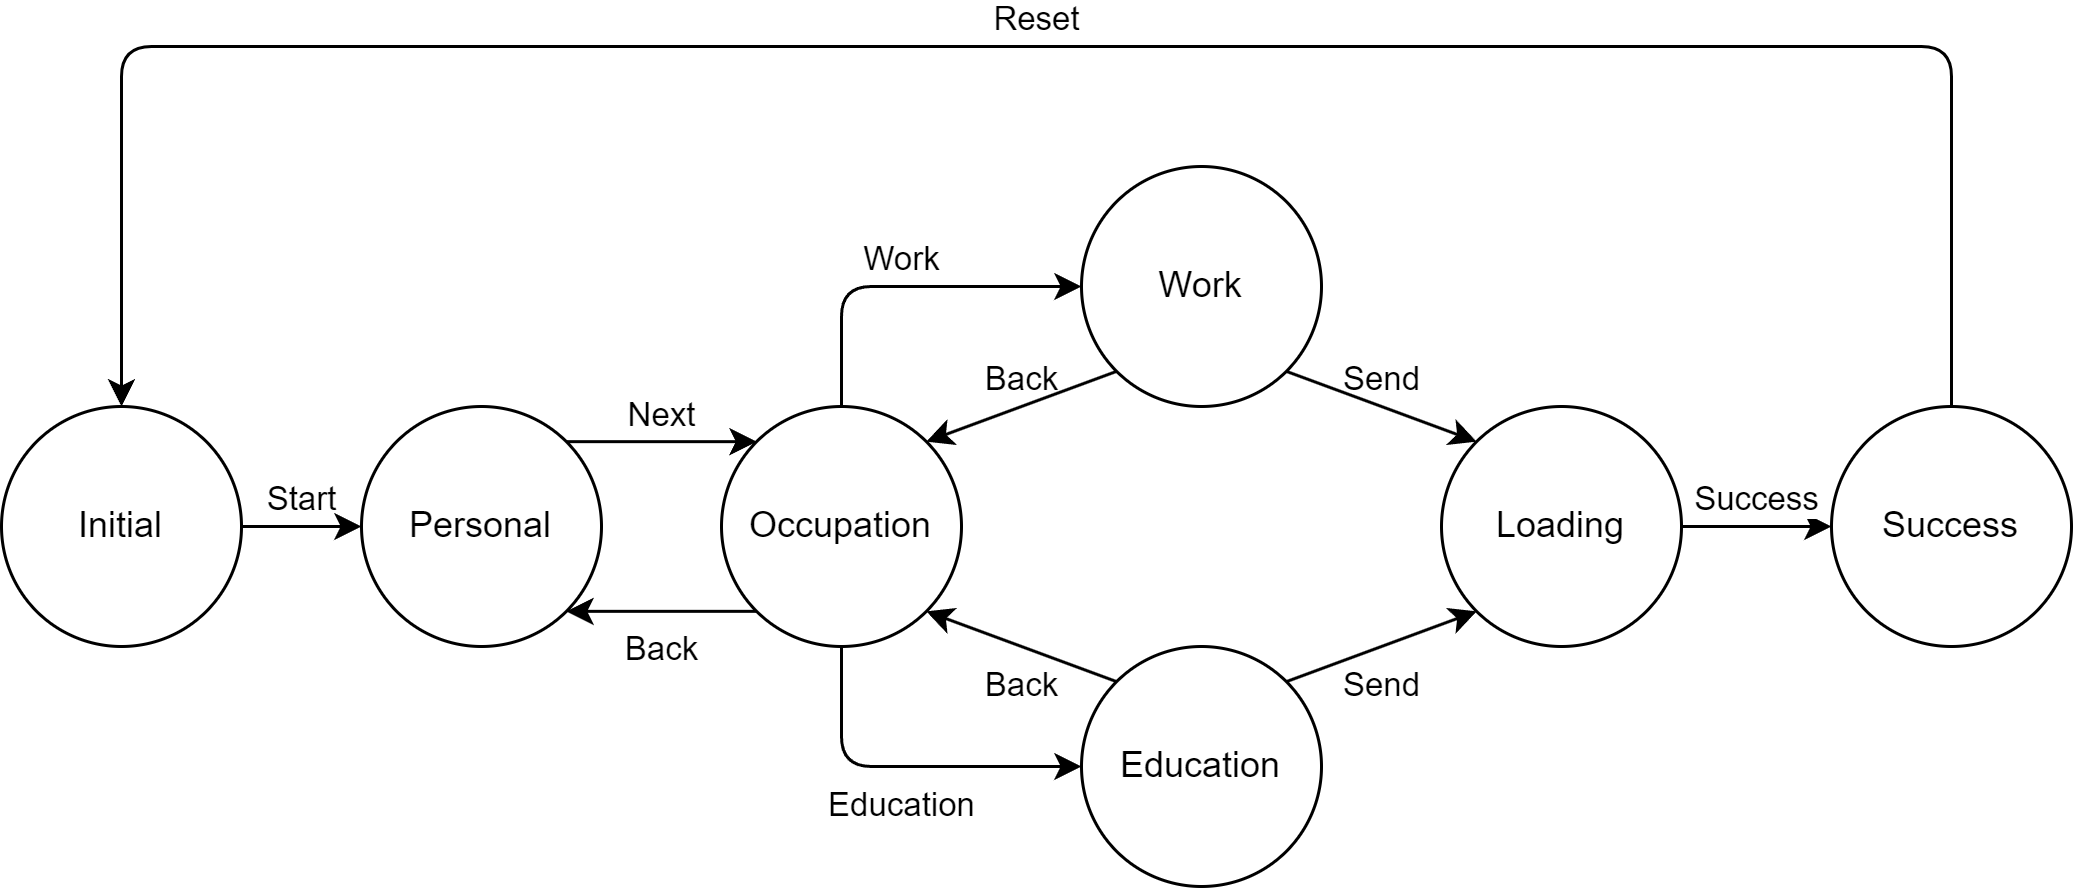
Now that it’s clear which states do we have and how they relate to each other, we can start work on our project!
First, we need to install additional dependencies:
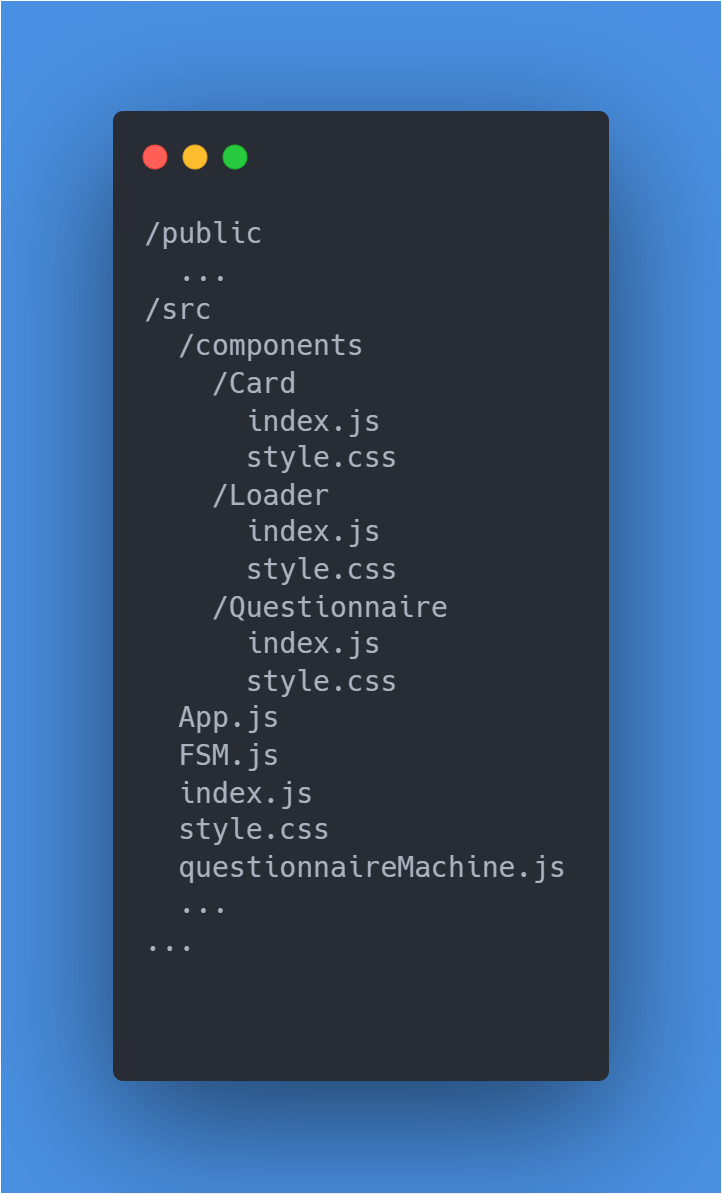
npm i animate.css react-transition-groupOnce the installation is complete, add the /components directory with a bunch of components inside of it. We will also create the questionnaireMachine.js file in the /src directory. After that, the project structure should look like this:
questionnaireMachine.js file will create and export the Questionnaire FSM instance:
The next step is to create the presentation layer of our project — the questionnaire itself! We’re gonna break it into three separate components:
- Questionnaire. The main component that defines the flow of the questionnaire
- Card. Reusable component for displaying the part of the questionnaire
- Loader. Simple animated dot
Let’s start with the Questionnaire component:
First, we need to subscribe to the FSM state changes. Every time it changes, we update uiState. We need uiState to calculate the Card component active property. This property allows the Card component instance to decide whether to show itself or not.
Now, the Card component:
Buttons at the bottom of the component use provided actions as the click event listeners. This is why we passed functions that change the FSM state. The Questionnaire component could update the uiState and then the corresponding card could show up.
The last little thing is the Loader component. Nothing interesting here, just an animated dot:
Finally, let’s inject the questionnaire into the App component:
When it’s done, you should have something very similar to this. If you do, pat yourself on the shoulder, you’ve just created FSM based questionnaire! If you don’t, please compare your code to this sandbox and you will catch up in no time.
The questionnaire we just created has a nice separation of the logic and the presentation, so it will be easy to adjust its behavior or appearance if we’d like. A single implementation of FSM could be used in as many components as we consider appropriate. This approach ensures the app works predictably and consistently.
One last thing. Even though this was a useful experience to create our own FSM from scratch, I strongly recommend using production-ready packages like XState. It has comprehensive documentation and all the tools you will need (possibly, even more) to get the job done.
That’s it! In this article, we talked about what FSM is and where we might want to use it. We wrote FSM from scratch and solved two different tasks with it. FSM could be useful in a wide variety of areas. It makes FSM a good approach to solve specific problems and a must-have technique to know.
I hope you find this article helpful! If you like it, please let me know!
Have a good day!